Packing camera gear for long hiking trips means carrying only the photography equipment that improves your results without making the trail harder. It matters because every lens, battery, strap, and case affects comfort, access, protection, and shooting speed outdoors.
This guide explains how to build a practical hiking camera kit, protect gear from weather, avoid common packing mistakes, and keep your setup light enough for real trail use.
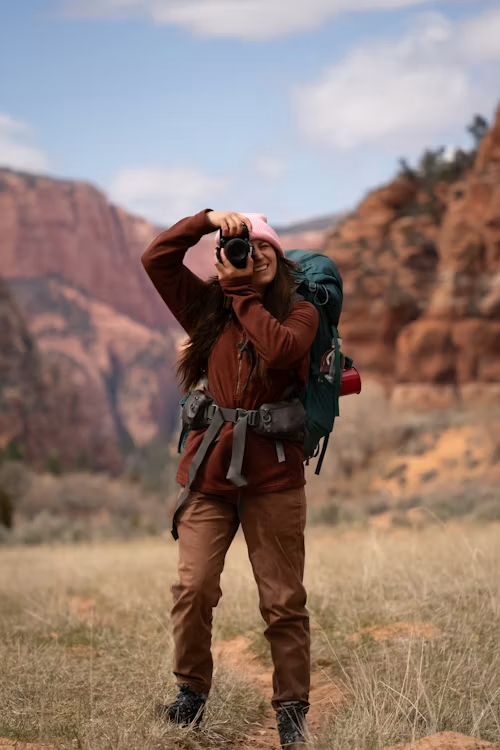
Why Does Camera Weight Matters More Than Most Hikers Realize?
Camera gear feels manageable at home, but it becomes very different after hours of climbing, sweating, and adjusting a loaded backpack. A heavy kit can slow your pace, reduce stability, and make you less likely to stop for photos when the light is actually good.
A major part of the key features of a camera for hiking is understanding how weight, grip, weather resistance, battery life, and lens flexibility work together on the trail. The best hiking setup is not always the most powerful one; it is the one you can carry comfortably and use quickly.
A lighter kit also helps with safer movement over rocks, roots, wet slopes, and narrow paths.
Building A Lightweight Photography Kit
A smart hiking camera kit starts with the camera body, one reliable lens, spare power, storage, and basic protection. Anything beyond that should earn its place in the pack.
For newer outdoor photographers, the best camera for hiking for beginners usually matters because simple controls, lighter bodies, and reliable auto modes make trail photography easier. A complicated setup can distract from hiking conditions, timing, and composition.
A practical lightweight kit may include:
- One camera body with a comfortable grip
- One versatile zoom or compact prime lens
- Two spare batteries
- Two memory cards
- A lightweight rain cover or dry bag
- A microfiber cloth
- A compact strap or capture clip
Avoid packing every lens “just in case.” Long hikes reward equipment discipline more than gear variety.
Choosing Lenses For Multi-Day Trails
Lens choice has the biggest impact on both image style and pack weight. For landscapes, a wide-to-standard zoom often handles most scenes. For wildlife, a longer lens helps, but large telephoto lenses can become tiring very quickly.
Many hikers comparing the best camera for hiking for wildlife photography realize that reach is only one part of the decision. Stabilization, autofocus, weight, and how often wildlife actually appears on the route all matter.
A good approach is to choose one primary lens based on the main purpose of the trip. If the hike is mostly scenic, prioritize landscapes. If the location is known for birds, deer, or mountain wildlife, accept the extra weight only if wildlife photography is truly the goal.
Camera Gear Packing Priorities
The best packing system protects gear while keeping it reachable. If the camera is buried deep in the backpack, you will miss quick light changes, wildlife movement, and natural candid moments.
| Gear Item | Best Packing Choice | Why It Matters |
| Camera body | Chest clip or padded top compartment | Keeps the camera accessible |
| Main lens | Attached to camera | Reduces lens changes outdoors |
| Spare batteries | Inner pocket or small pouch | Protects from cold and moisture |
| Memory cards | Hard case | Prevents loss and damage |
| Cleaning cloth | Side pocket | Useful for mist, dust, and fingerprints |
| Rain cover | Top pocket | Needed quickly in sudden weather |
A good packing system should feel natural after a few miles. If it constantly needs adjusting, it is too complicated for long-distance hiking.
Protecting Camera Gear From Weather And Trail Damage
Outdoor photography exposes cameras to dust, sweat, rain, snow, and accidental bumps. Even weather-sealed cameras still need care because moisture can enter through lens mounts, battery doors, and accessory ports.
Some add-ons, accessories, and enhancements are genuinely useful when they solve real trail problems, such as rain protection, easier carrying, or better grip. Others simply add clutter and weight.
Useful protection habits include:
- Keep the camera facing inward when scrambling
- Use a dry bag during heavy rain
- Store batteries away from cold outer pockets
- Wipe dust before changing lenses
- Avoid placing gear directly on wet ground
- Use a padded insert instead of loose packing
These small habits protect both the camera and the hiking experience.
Common Mistakes That Add Unnecessary Weight
Many hikers overpack because camera gear feels important before the trip begins. The problem is that unused equipment still drains energy.
Battery failures, fogged lenses, full memory cards, and loose accessories are among the common problems of cameras for hiking & their solutions that can often be prevented with better planning. The goal is not to carry more; it is to carry smarter.
Common weight mistakes include packing multiple similar lenses, carrying a large tripod for casual photos, bringing too many filters, and using bulky camera bags that do not fit well inside a hiking pack.
For most long hikes, a compact tripod, one versatile lens, and reliable power planning are more useful than a full photography setup.
Creating A Camera Setup For Different Hiking Styles
Not every hike needs the same camera arrangement. A short scenic walk, a mountain day hike, and a multi-day backpacking route all require different priorities.
For day hikes, access matters most. A chest clip or side-carry system works well because the camera can stay ready without stopping often. For backpacking, protection and weight become more important because the camera must share space with food, shelter, water, and clothing.
Minimalist hikers may prefer a compact camera or lightweight mirrorless body. Serious photographers may accept more weight for better image quality, but the setup still needs to match the trail, weather, and distance.
A carefully planned packing system keeps essential equipment accessible while reducing fatigue, weather exposure, and unnecessary trail weight.
FAQs About Packing Camera Gear for Long Hiking Trips
Packing photography equipment for a long hike often raises questions about weight, storage, tripod use, battery protection, and lens changes. These answers address the most common concerns hikers face when preparing a practical camera kit.
How much camera gear should I carry for hiking?
Carry only what you will realistically use. For most long hikes, one camera body, one versatile lens, spare batteries, memory cards, and basic weather protection are enough.
Should I use a camera bag or backpack insert?
A backpack insert is usually better for long hikes. It protects gear while fitting inside your hiking pack, leaving room for water, layers, food, and safety items.
Is a tripod worth carrying on hiking trips?
Yes, but only if you shoot landscapes, low light, waterfalls, or video. For casual hiking photos, a large tripod often adds more weight than value.
How do I keep camera batteries from draining in cold weather?
Keep spare batteries in an inner pocket close to your body. Cold temperatures reduce battery performance, so rotate batteries and avoid leaving them in exposed pack compartments.
Should I change lenses on the trail?
Yes, but only when necessary. Change lenses away from wind, dust, rain, and sand. Keeping one versatile lens attached reduces risk and saves time.
These answers clarify the essential packing decisions that help hikers protect their equipment, manage trail weight, and remain ready for outdoor photography opportunities.
Final Verdict
Packing camera gear for long hiking trips is about balance, not carrying the most equipment. A reliable lightweight setup helps you move comfortably, protect your camera, and stay ready for the best moments outdoors.
The smartest kit is the one that supports both the hike and the photography without making either harder.